
Construct and Send Your First CKB Transaction

Transactions are the most fundamental entities in the Nervos CKB blockchain. We can only interact with CKB through transactions, which are essential to trigger state changes. Want to send some coins? Or call a smart contract? In CKB, anything you want to accomplish requires a valid transaction that gets added to the blockchain. Only when the transaction is successfully submitted, verified, recorded in a block, and accepted by the entire CKB network, the change you made takes effect.
This post is a concise and easy-to-follow tutorial on how to construct and send a transaction in CKB. Step by step, you will learn how to create an address from scratch, how to claim and send coins to complete a transaction.
I’ve prepared a repository for this tutorial. We won’t go into too much detail on the implementation or data conversion, but will focus on the how-to aspect of making CKB transactions.
Don’t be afraid if you don’t know anything about coding. Believe me (or not :-)) it’s pretty easy! It’s a plus if you have a basic understanding of some concepts about Bitcoin transactions, such as inputs, outputs, and the Proof-of-Work based Nakamoto consensus.
Let’s get started!
Get Prepared
We'll use Replit which makes writing and running code easy. I have prepared this “ckb-example” in Java that you can clone by clicking the Fork Repl button.
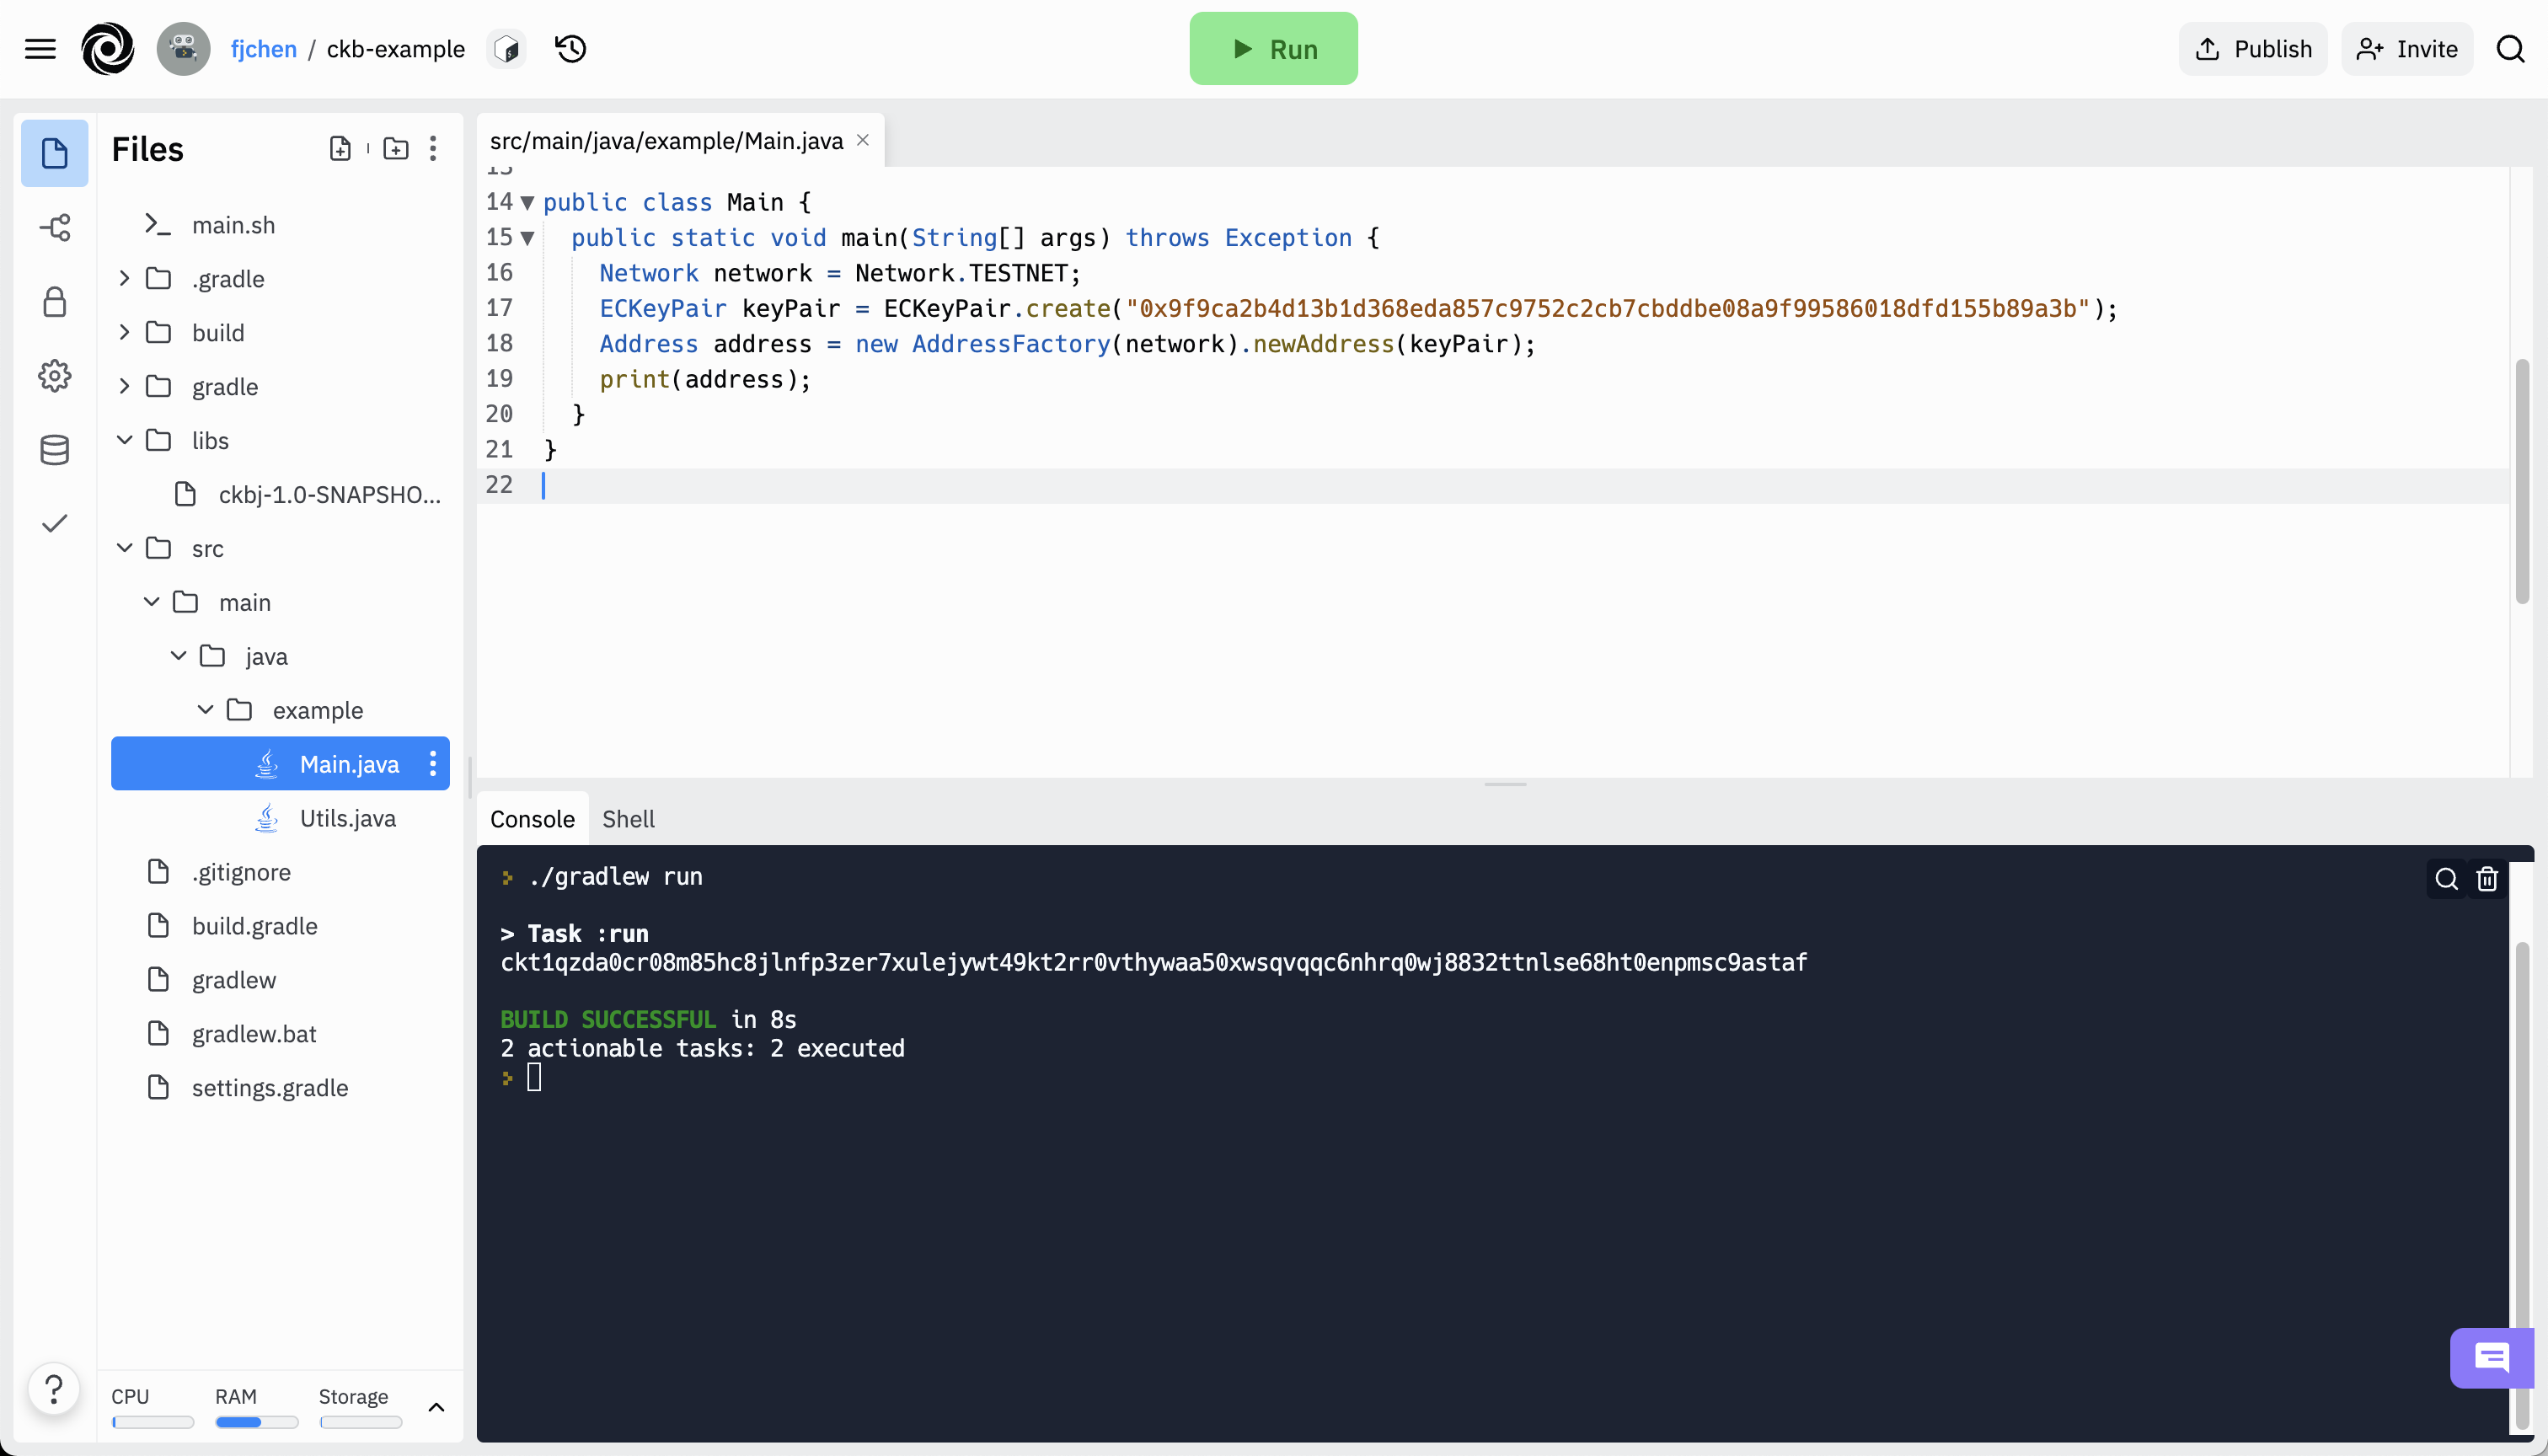
Here is the page of the project.
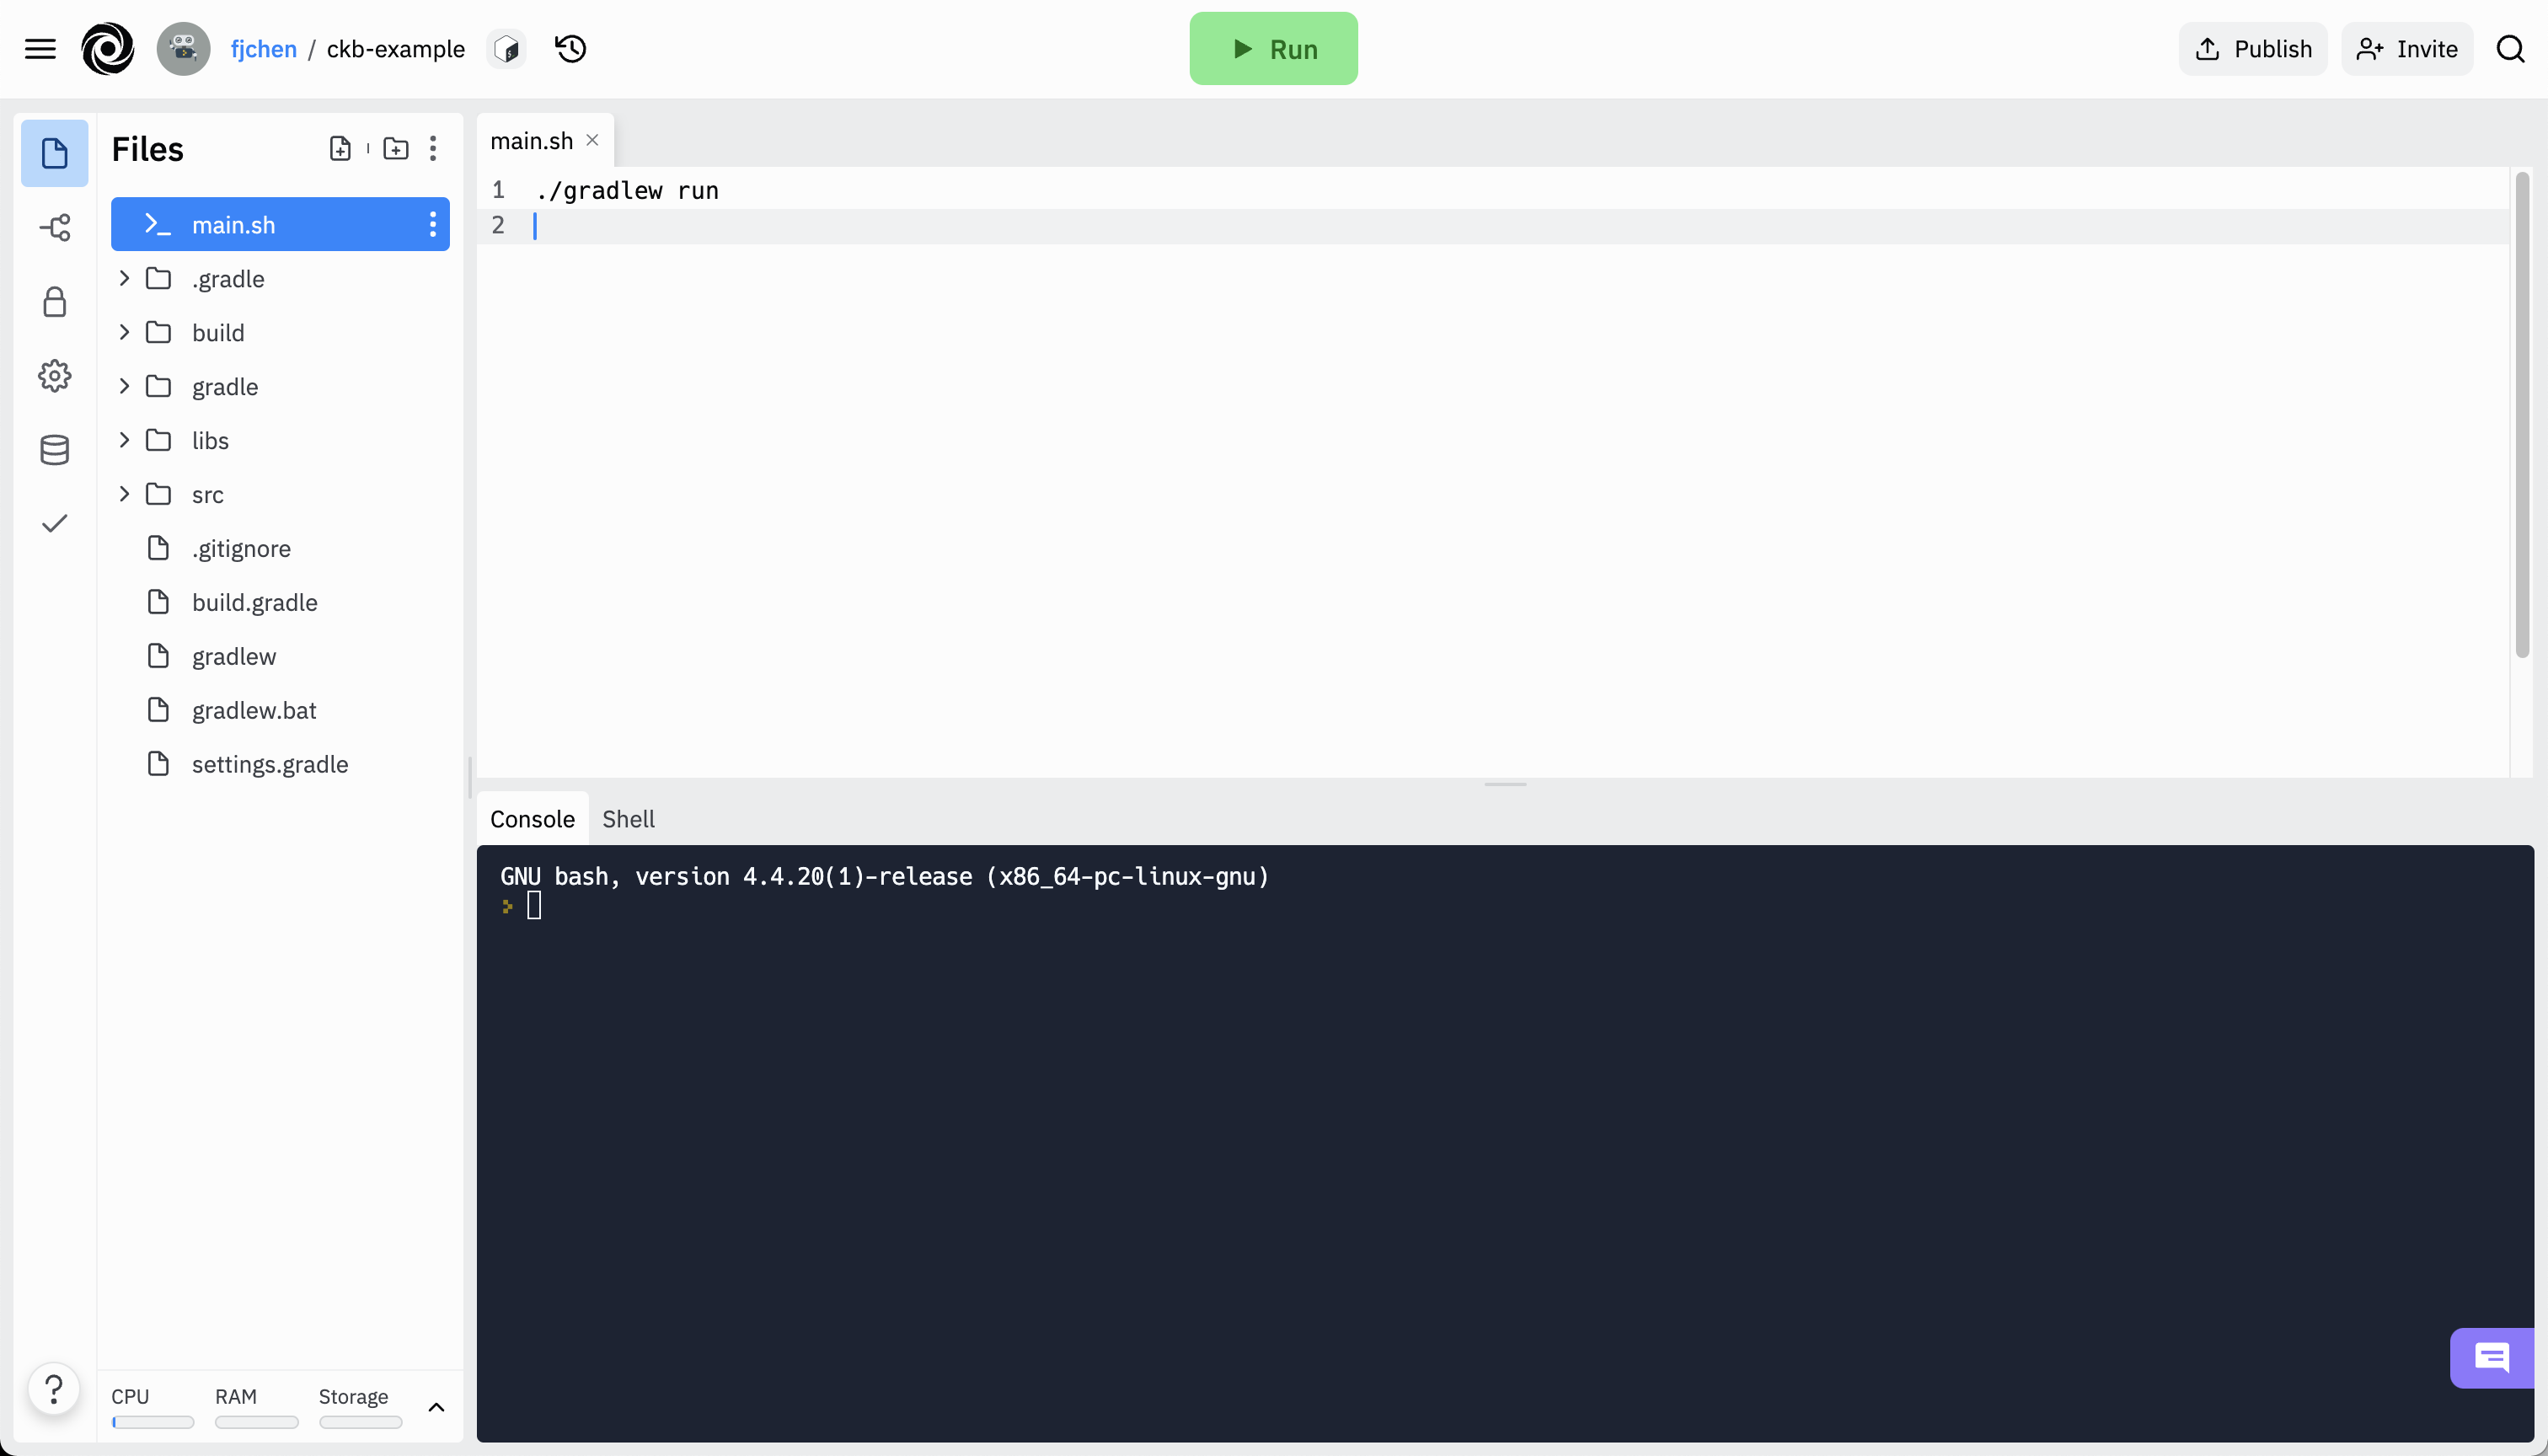
Click Run to start the program. It takes a bit longer to compile for the first time.
The entry of the program is the main method of the Main.java file. In the next few steps, we will modify the main method to send a transaction to the CKB testnet. Every time you make an edit, click Run to re-execute.
Take it easy, there won’t be too much Java in this tutorial. I've done the coding part, you just have to make a few changes to finish the operation. If you have never learned Java, no worries, everything is easy to handle.
1. Generate Key Pair
We need an address under our ownership. "Ownership" means that the owner is entitled to manage the balance under this address. The address is generated by the public key, and we need to use the corresponding private key of this public key to sign the transaction when transferring our assets. The public and private keys form a key pair, which must be generated first to create the address.
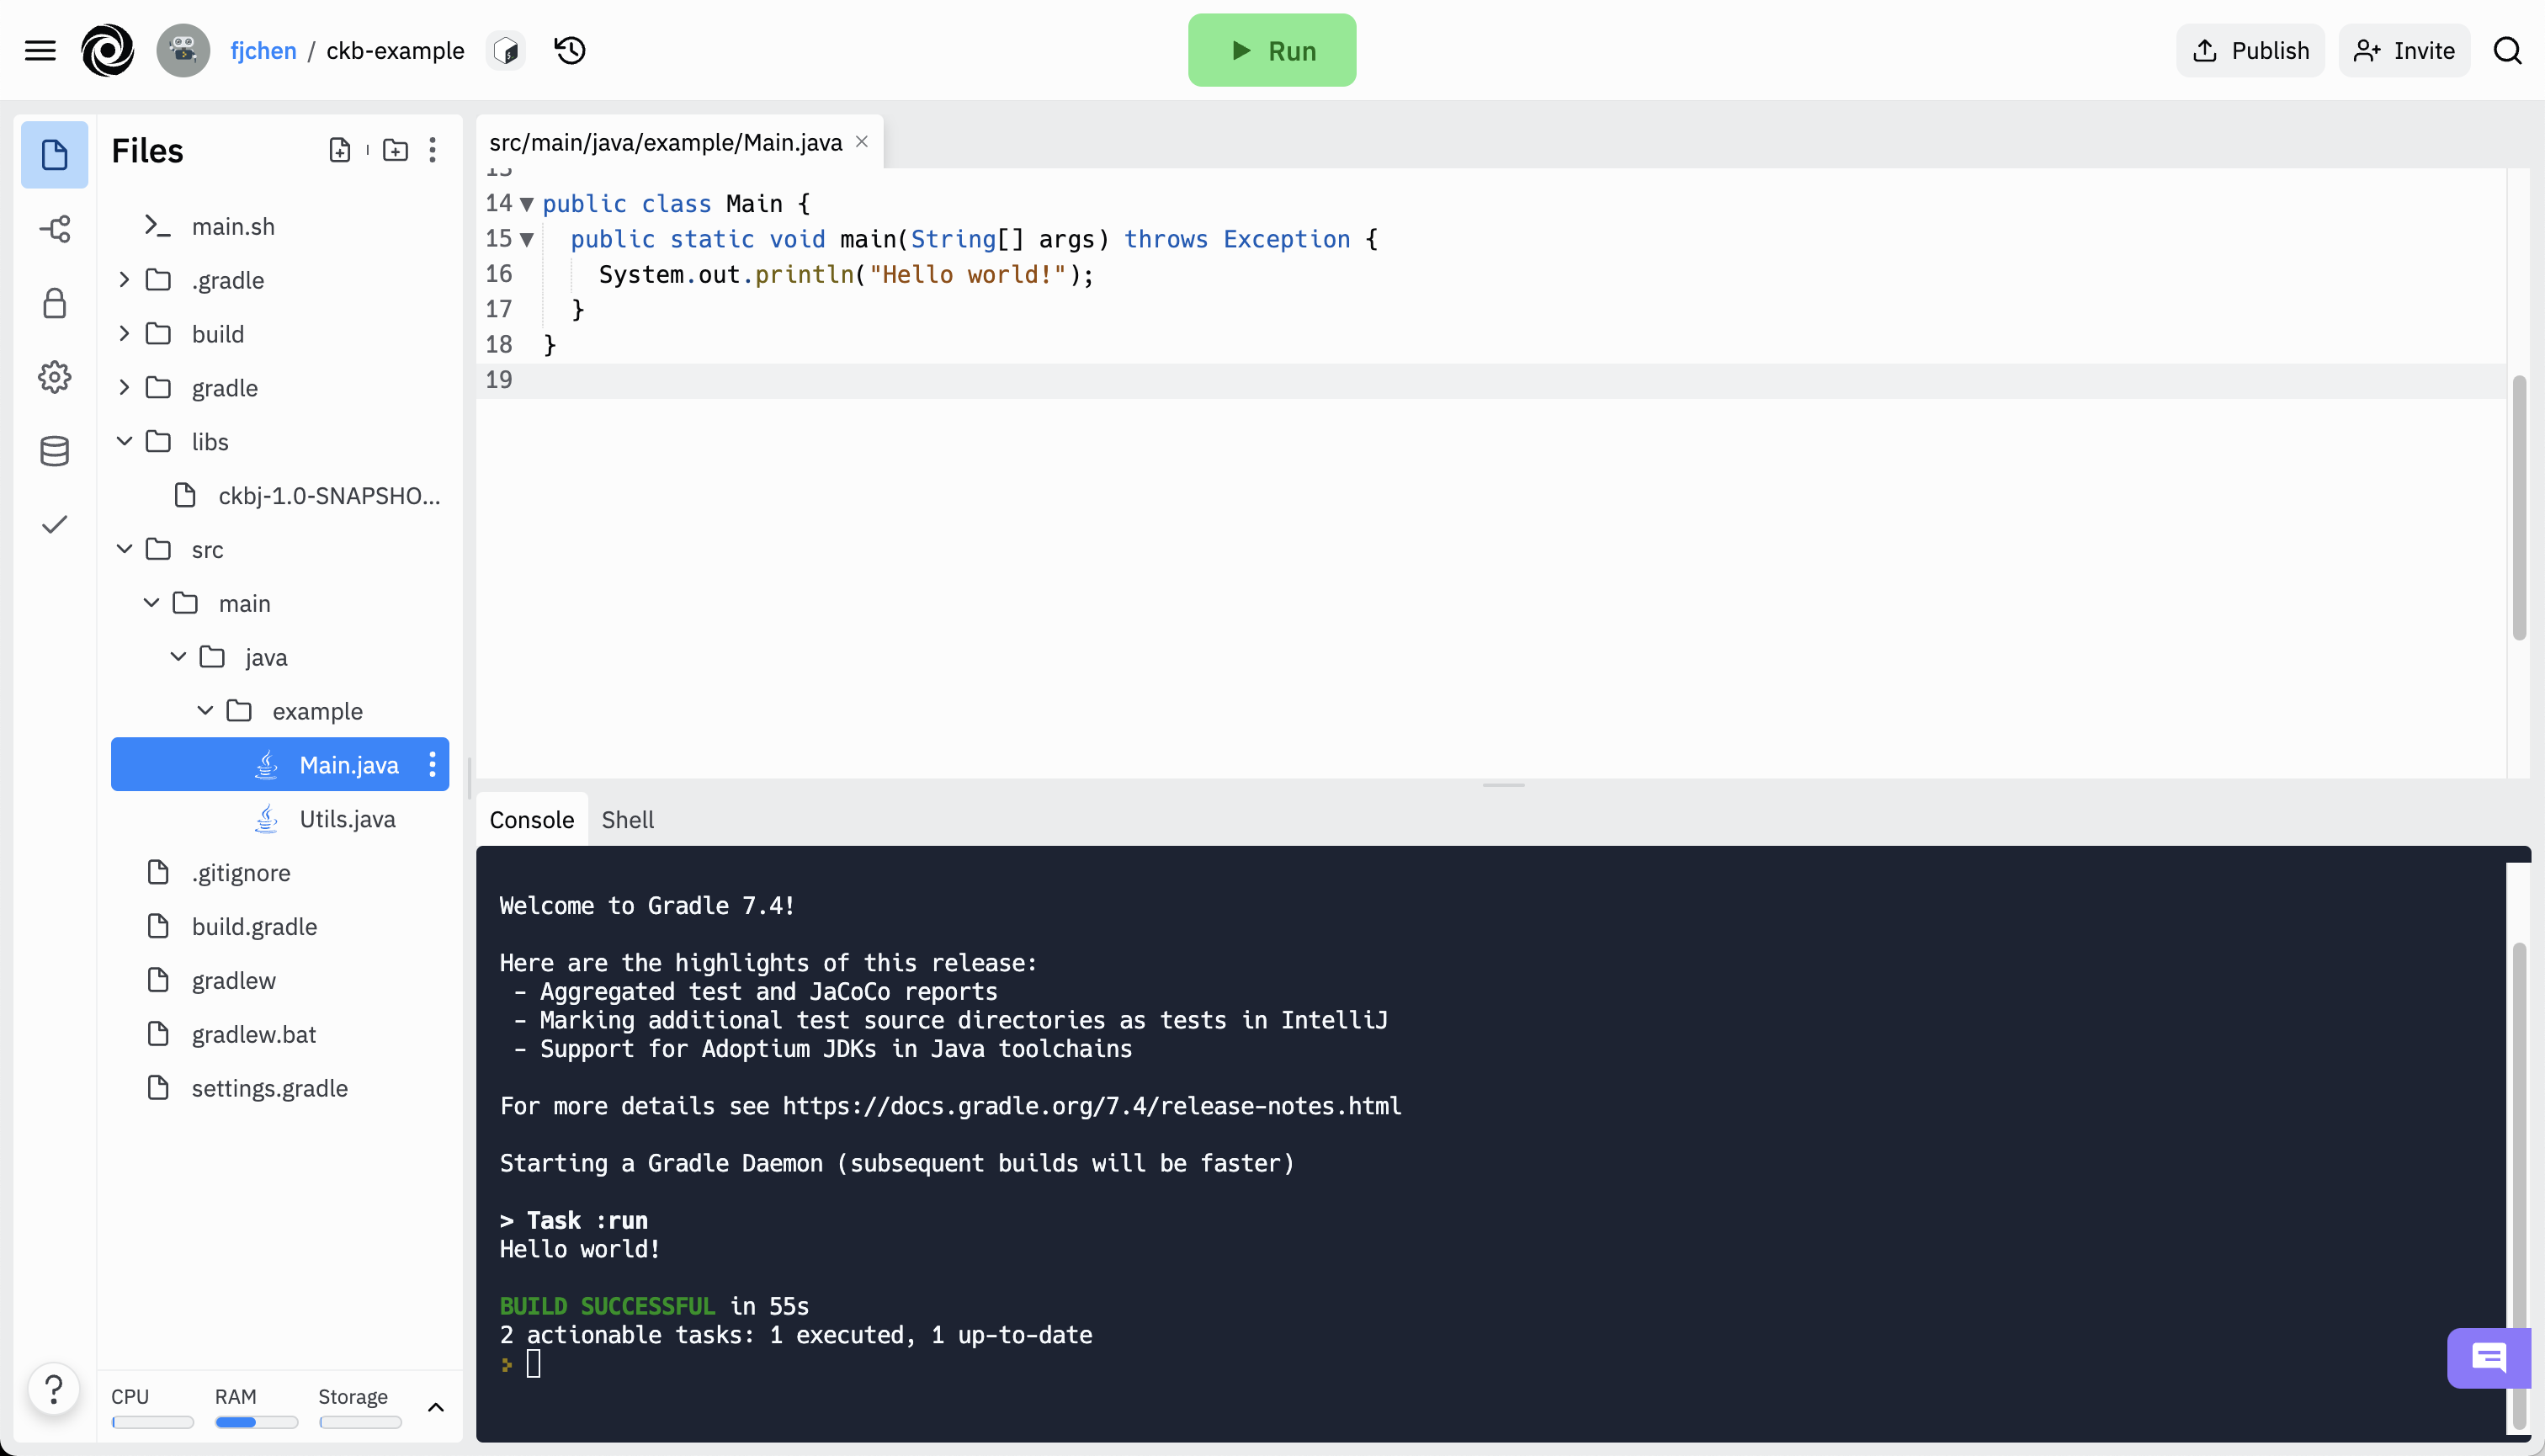
Fill in the main method as follows:
ECKeyPair keyPair = ECKeyPair.random();
print(keyPair.getEncodedPrivateKey());
Click Run. The code above will generate a random key pair and print the private key.
Write down the private key which will be used later to generate addresses and sign transactions.
2. Create an Address
To generate an address with the previous key pair, first we need to modify the content in main as the following code block suggests.
Make sure to change the parameter of ECKeyPair.create to your own private key.
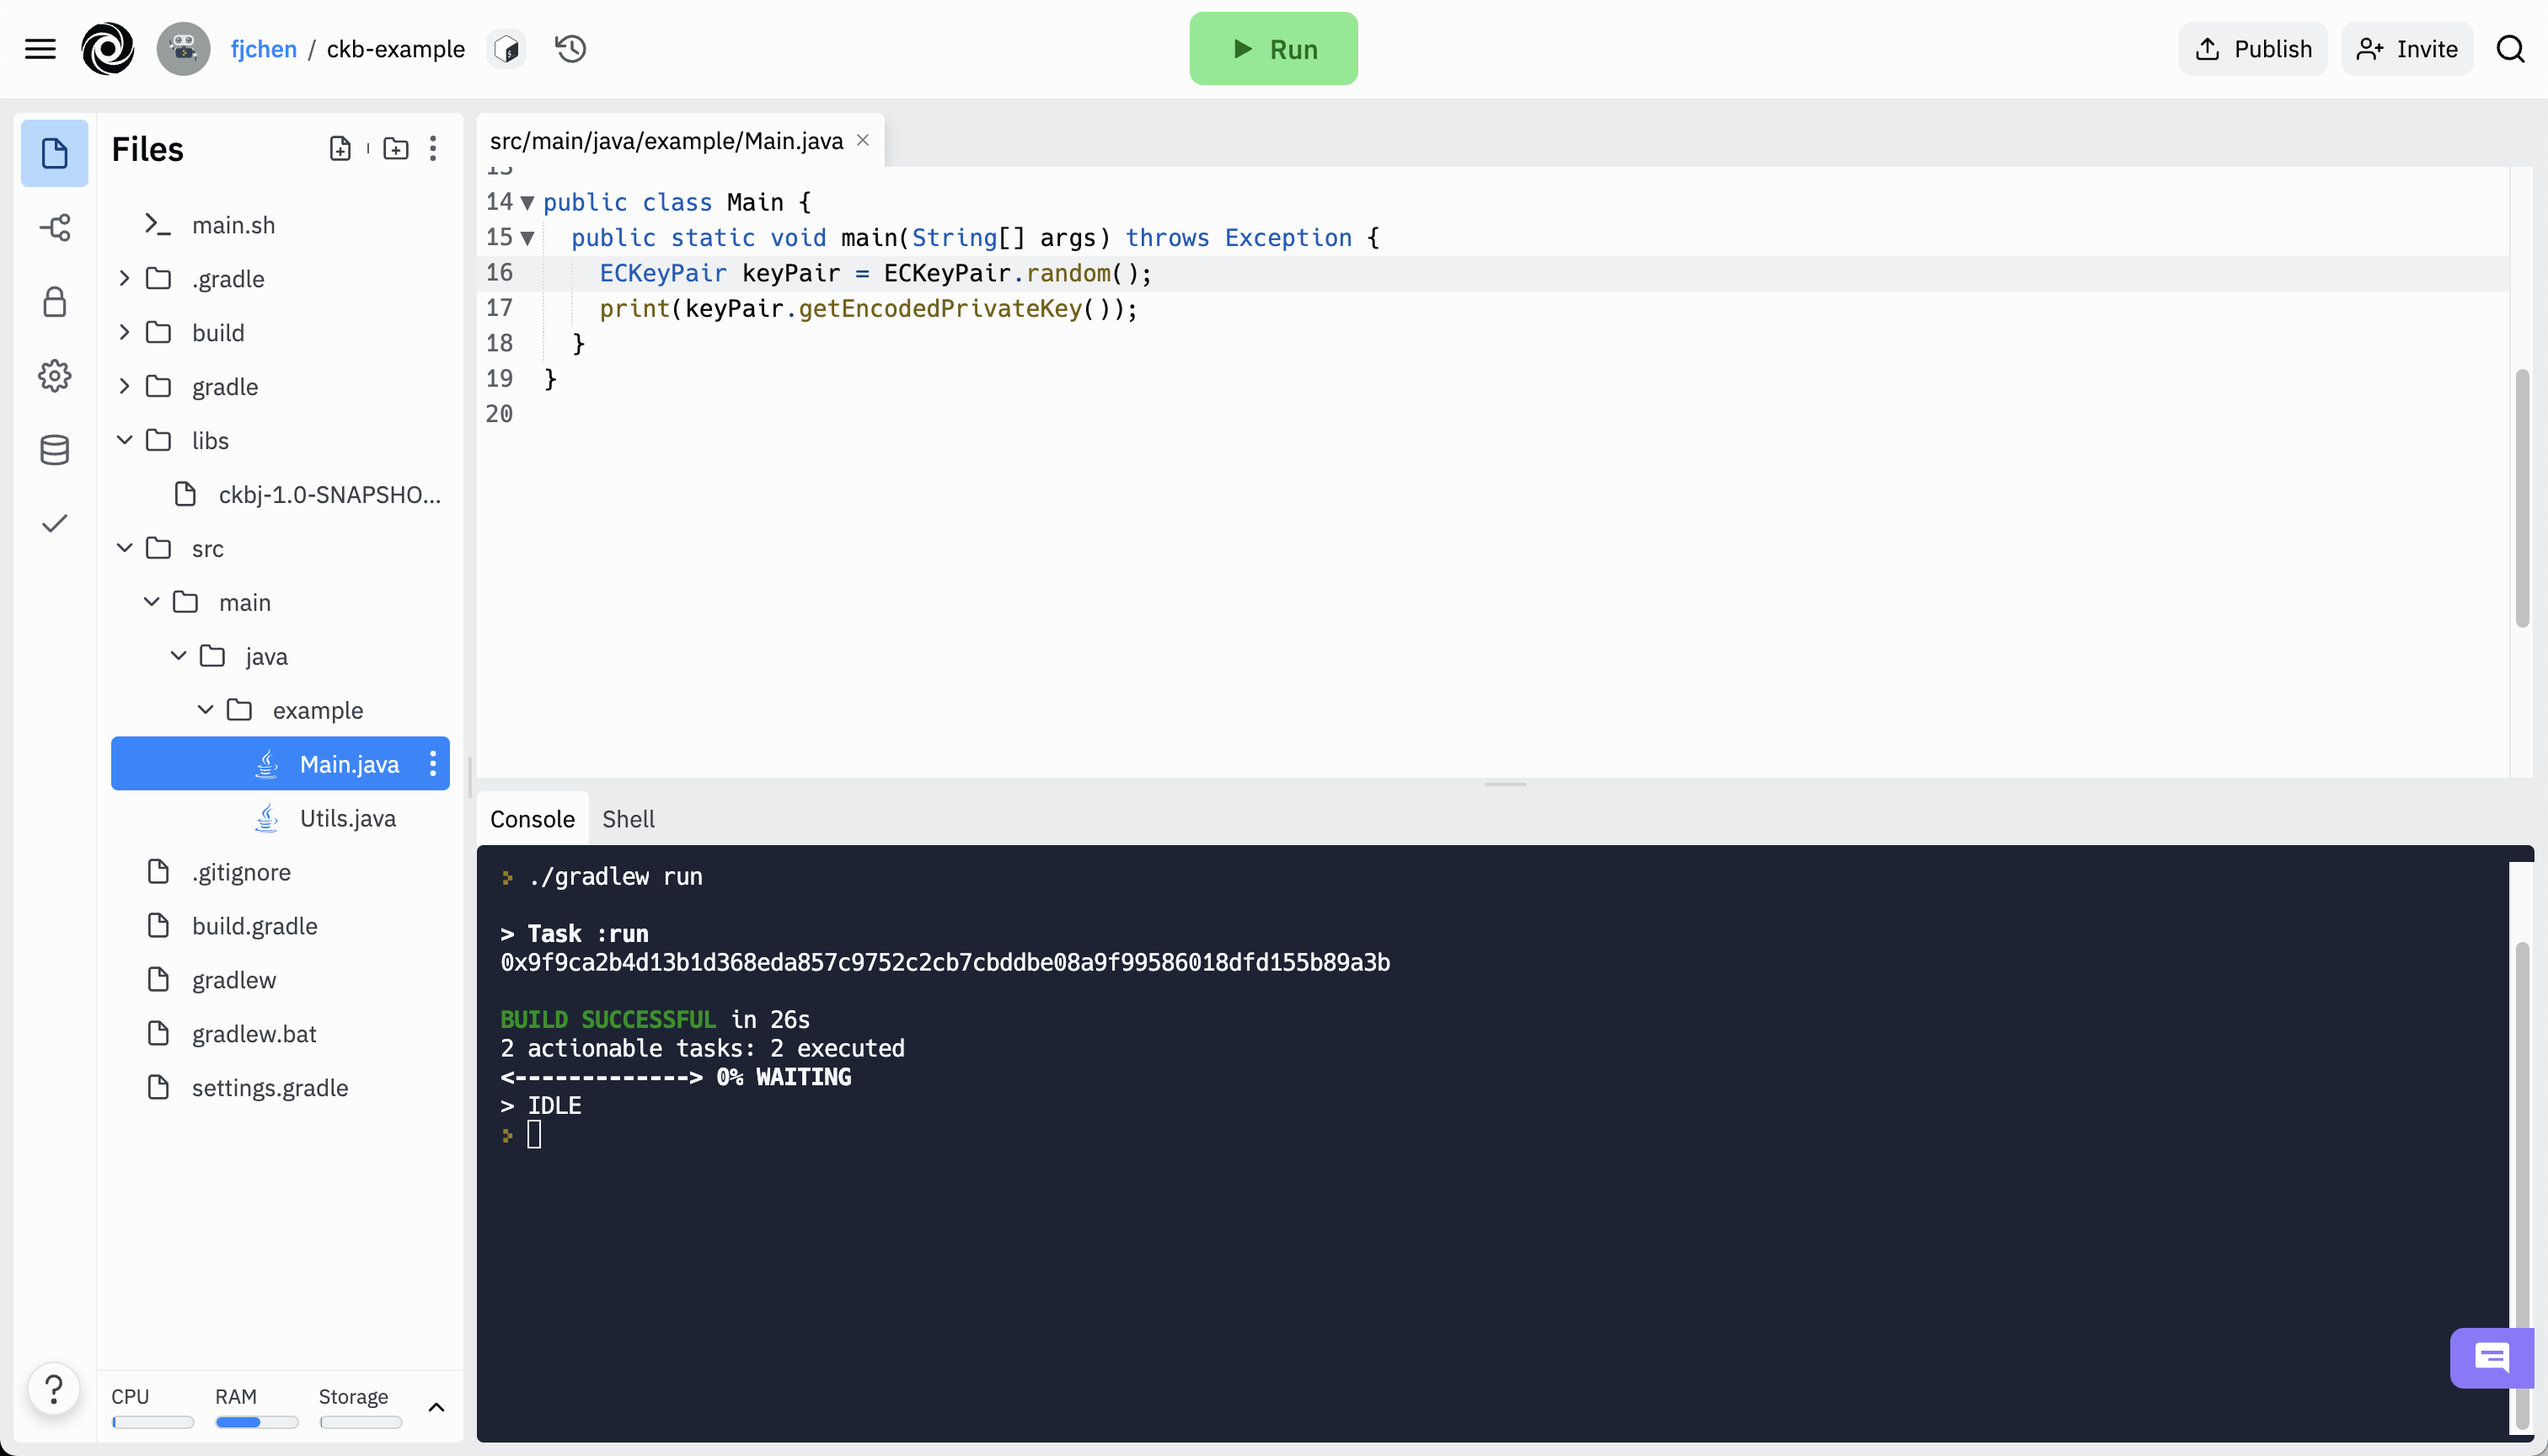
Network network = Network.TESTNET;
ECKeyPair keyPair = ECKeyPair.create("0x9f9ca2b4d13b1d368eda857c9752c2cb7cbddbe08a9f99586018dfd155b89a3b");
Address address = new AddressFactory(network).newAddress(keyPair);
print(address);
Click Run, and the command line will print out the address.
Viola, here it is:
ckt1qzda0cr08m85hc8jlnfp3zer7xulejywt49kt2rr0vthywaa50xwsqvqqc6nhrq0wj8832ttnlse68ht0enpmsc9astaf
The corresponding private key is: 0x9f9ca2b4d13b1d368eda857c9752c2cb7cbddbe08a9f99586018dfd155b89a3b
Let's take a closer look at the address format. The ckt at the beginning of a CKB address represents a testnet address.
Try to change the network to Network.MAINNET and see what will be printed.
If you see ckb instead of ckt, then this address is a CKB mainnet address.
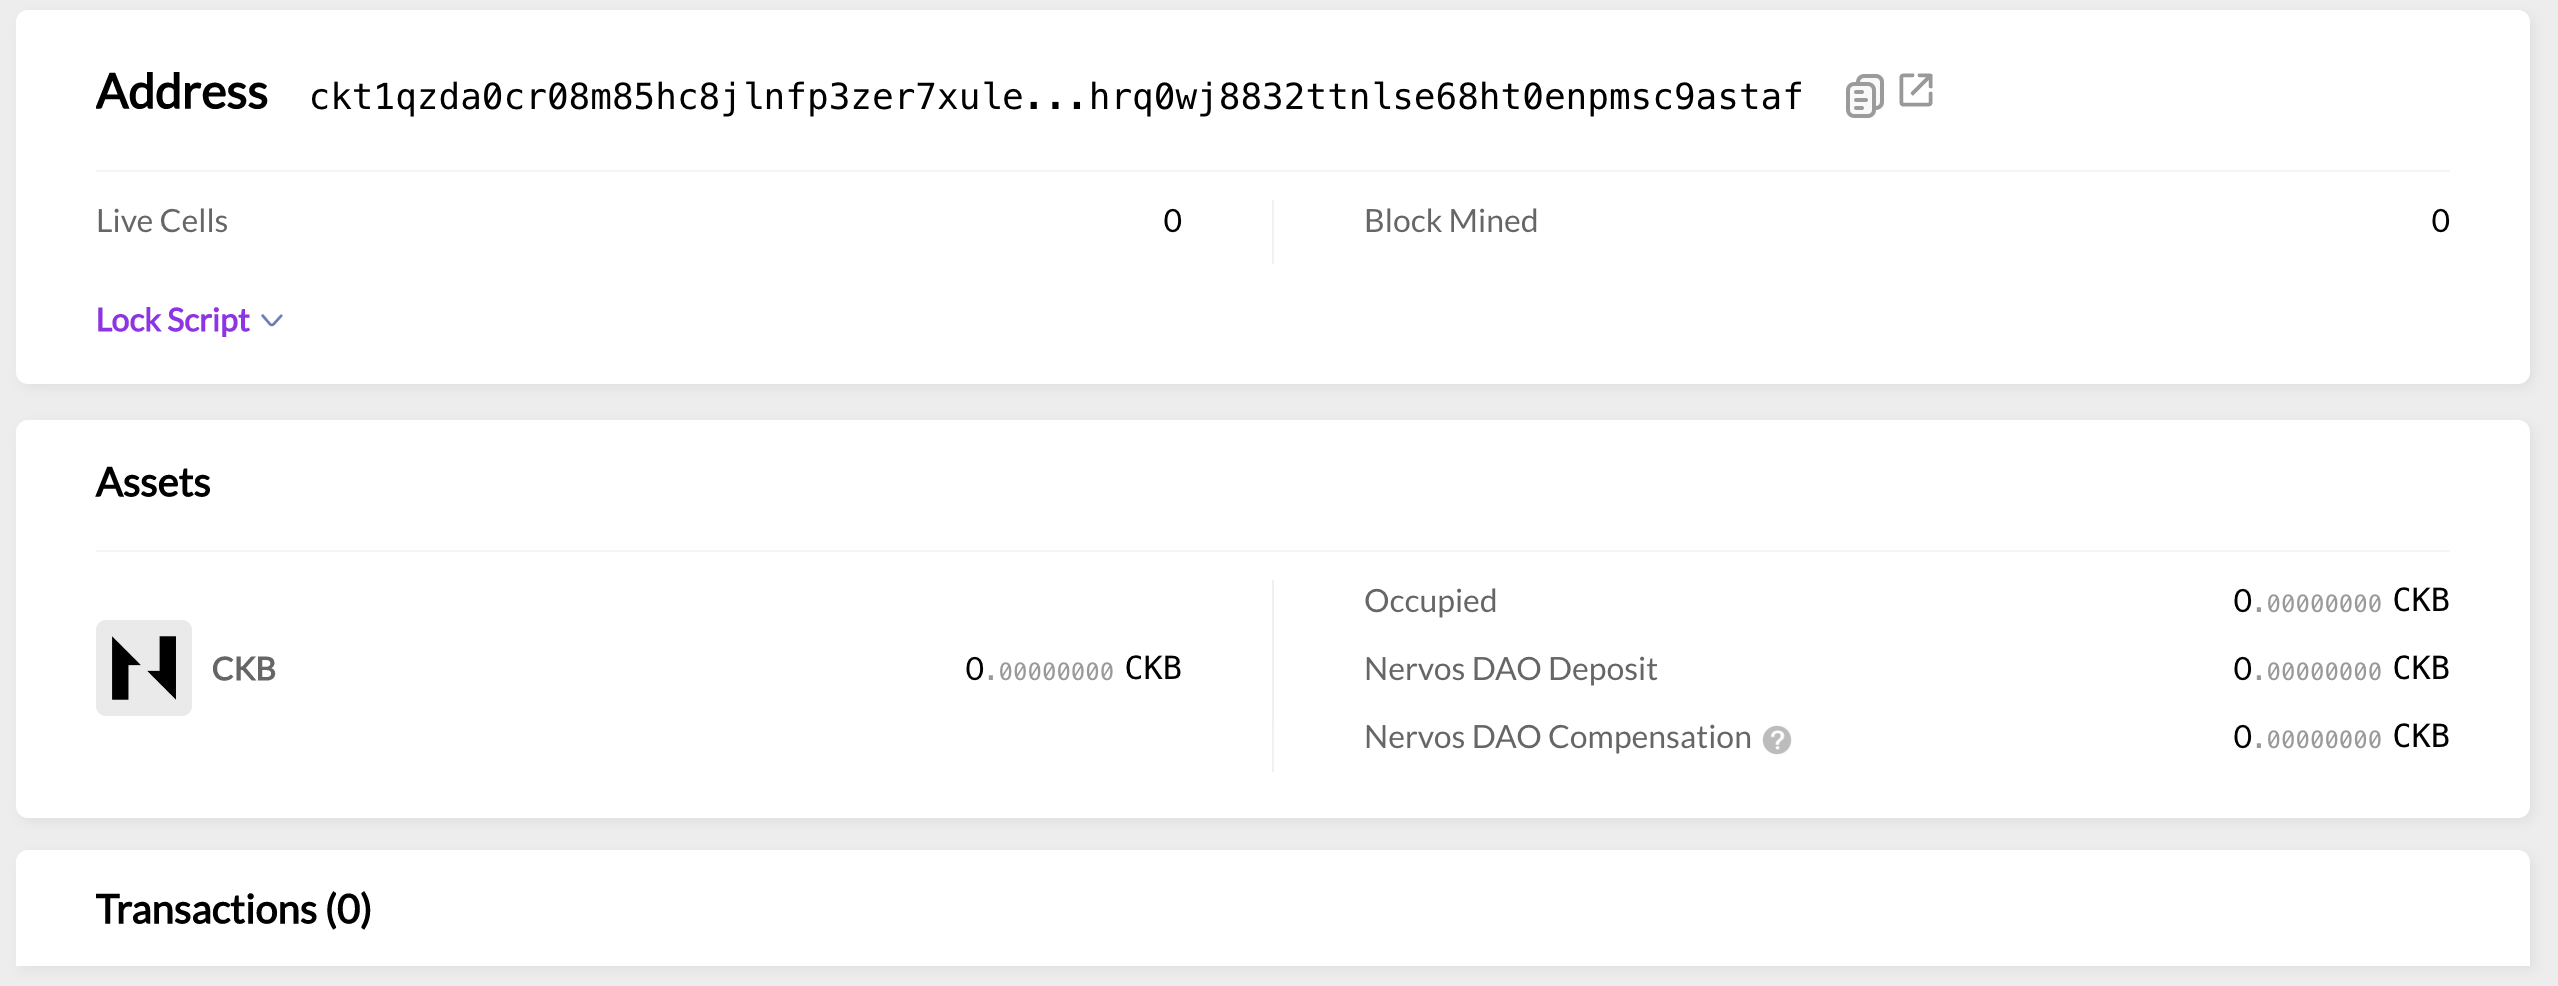
CKB’s Pudge testnet explorer lets you examine the address details. Since we just generated our address, it has not yet been associated with any transactions.
3. Claim the Coins
To get some coins to make a transfer, visit the Nervos Pudge Faucet.
Fill in the address and click Claim to receive coins. You can receive 10000 CKBytes from the faucet, which is enough for testing. This page also shows the most recent transactions with their hash values (with the hex string) and status (Pending, Processed) as well.
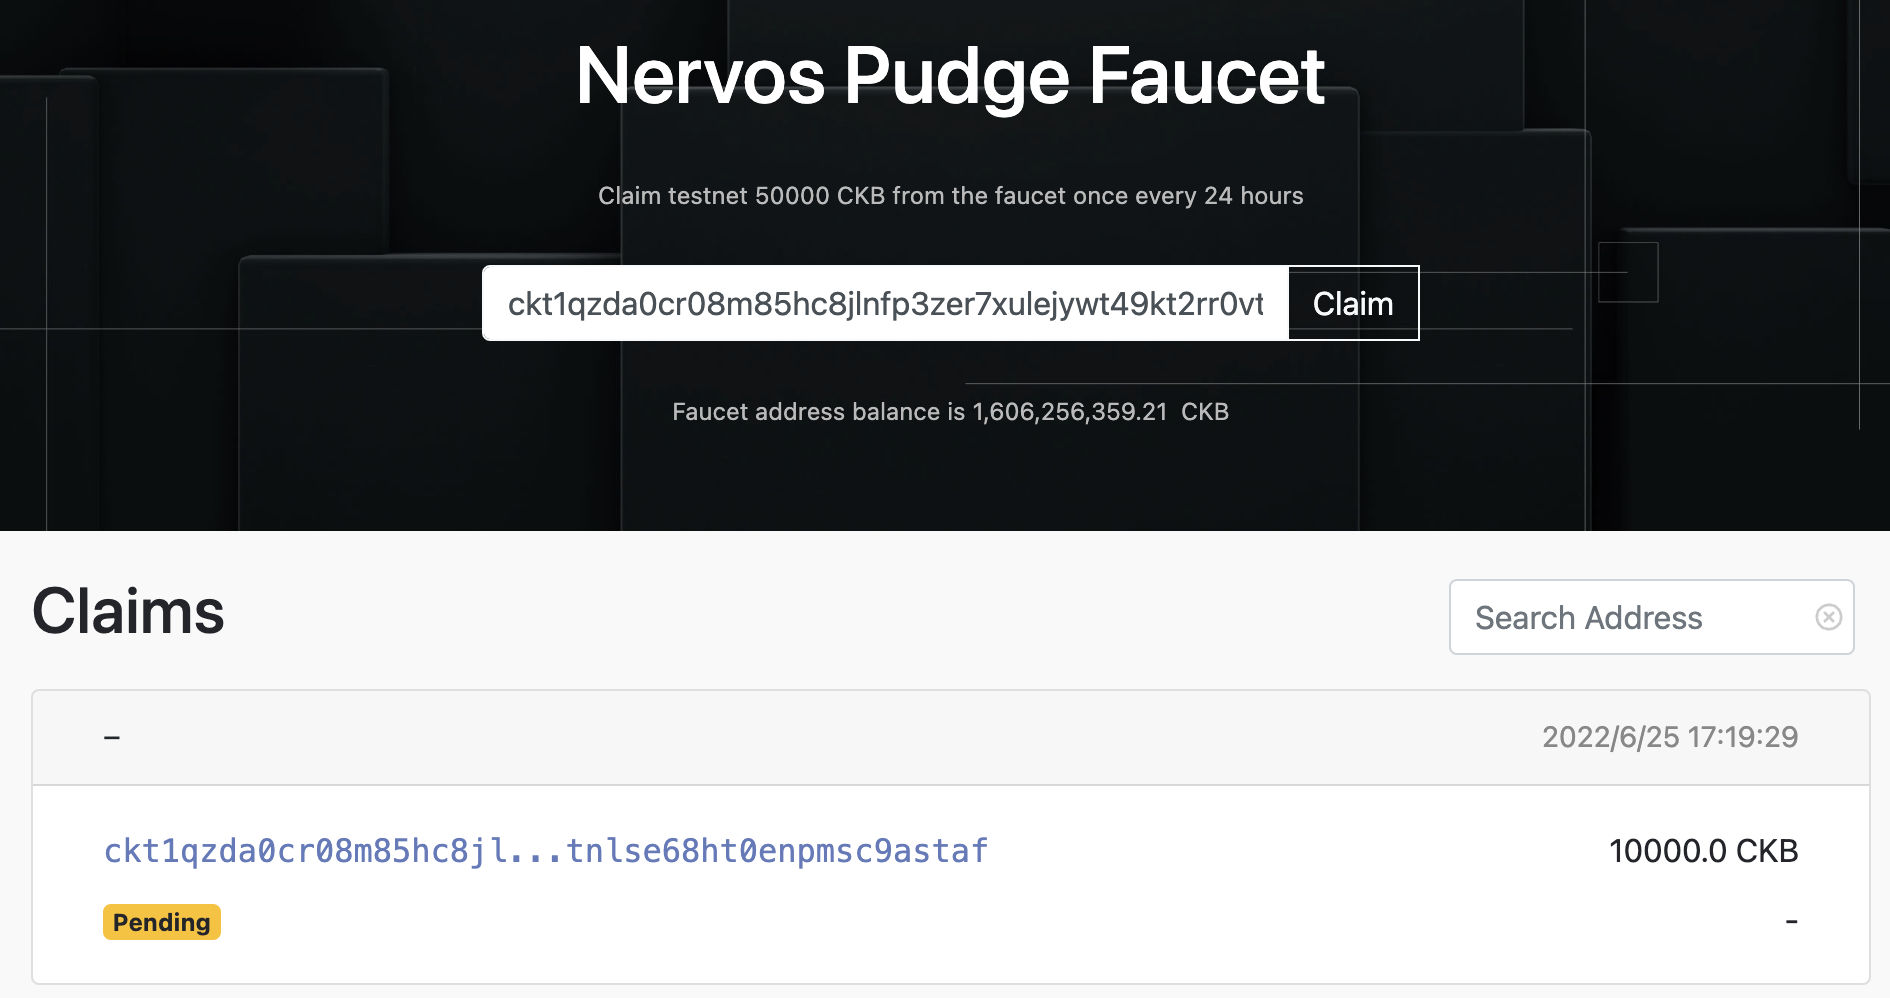
It takes some time for the transaction to be confirmed. Once the status changes from Pending to Processed, the transaction has been sent on chain successfully. Now there are CKBytes in our address.
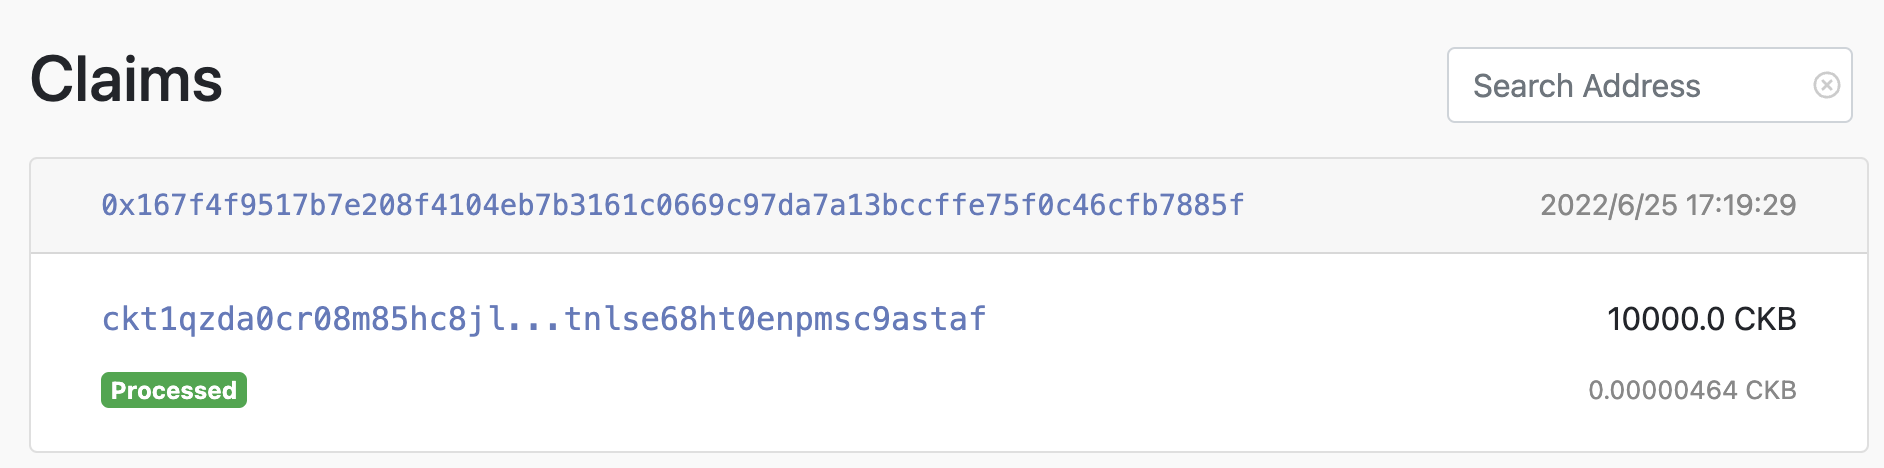
Meanwhile in the CKB testnet explorer, our balance has been updated.
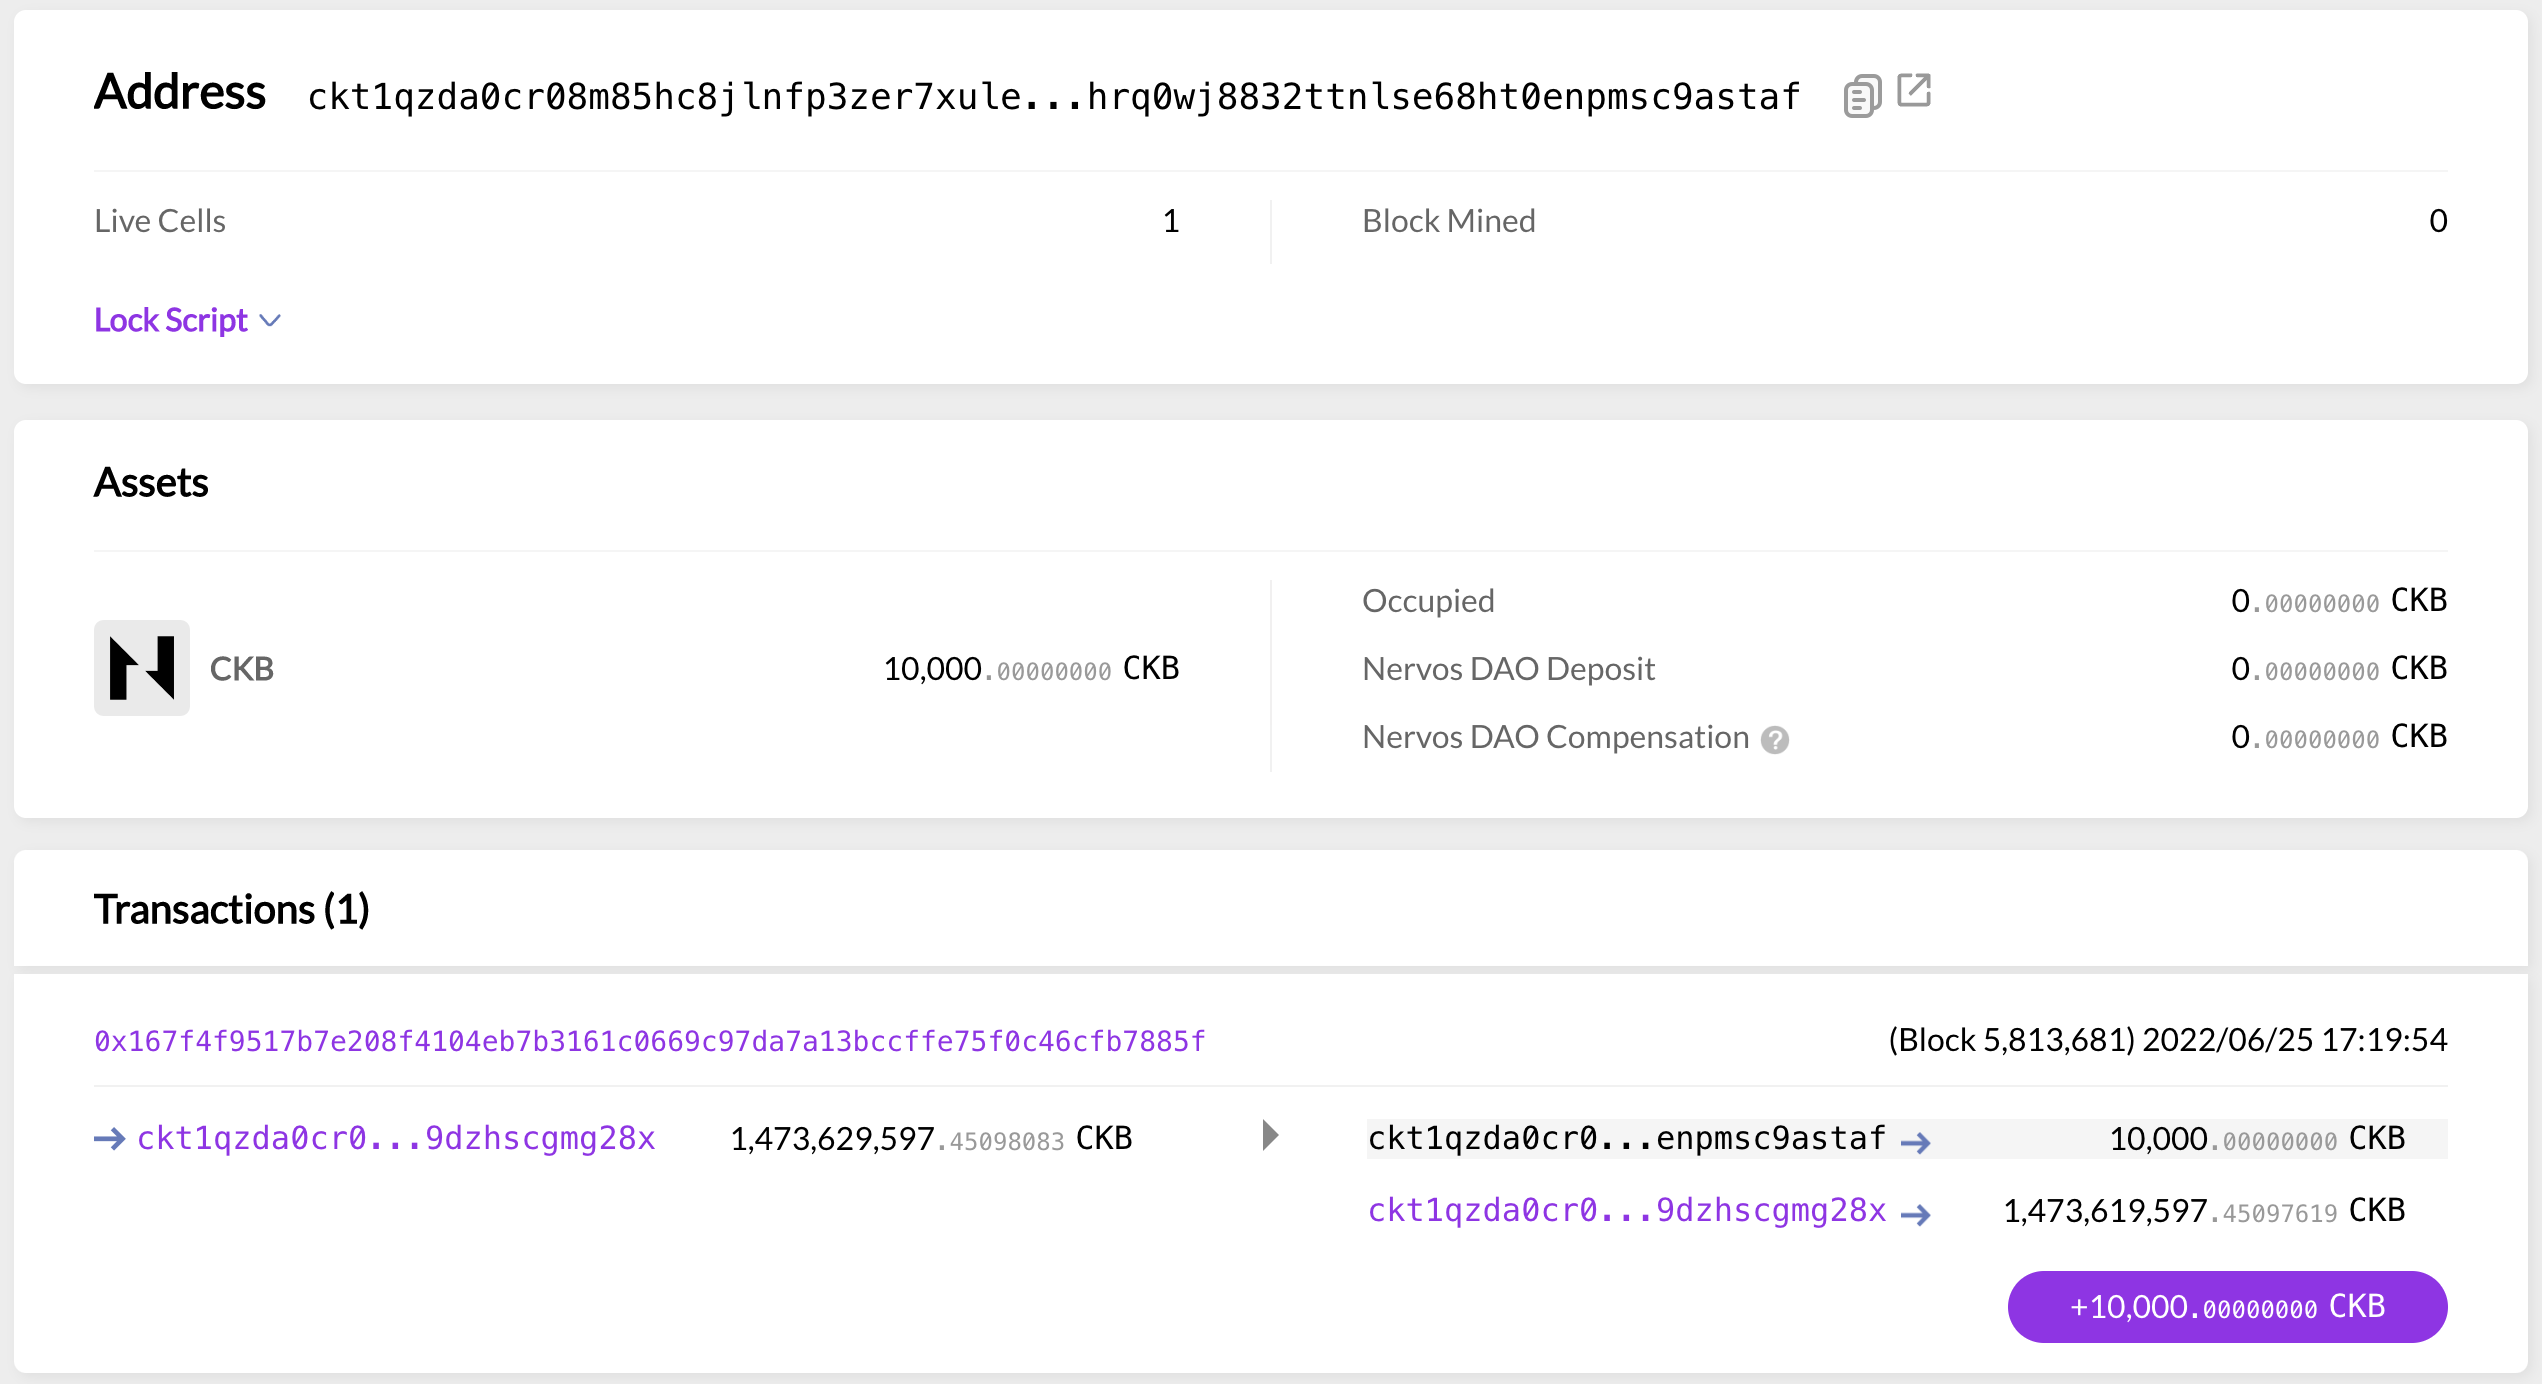
This transfer was completed in the transaction 0x167..85f. Representing the hash value of the transaction, the hexadecimal string can be used to locate a specific transaction.
A Bitcoin transaction takes the previous transaction's Output as its Input, consumes it, and produces a new Output. CKB works similarly. In this transaction, two Outputs are generated, where the first transfers the CKBytes to our address; while the second returns the change to the sender.
Outputs in CKB are ordered from 0. Therefore, we can uniquely identify each Output using the transaction hash and the index values. We name the (tx_hash, index) structure “OutPoint”, as it represents the output address. In this example, the Outpoint that belongs to our address is: (0x167...85f, 0). Please note it down. We will use it to construct a transaction very soon.
4. Construct a Transaction
It’s helpful to take a quick look at CKB’s transaction structure first.
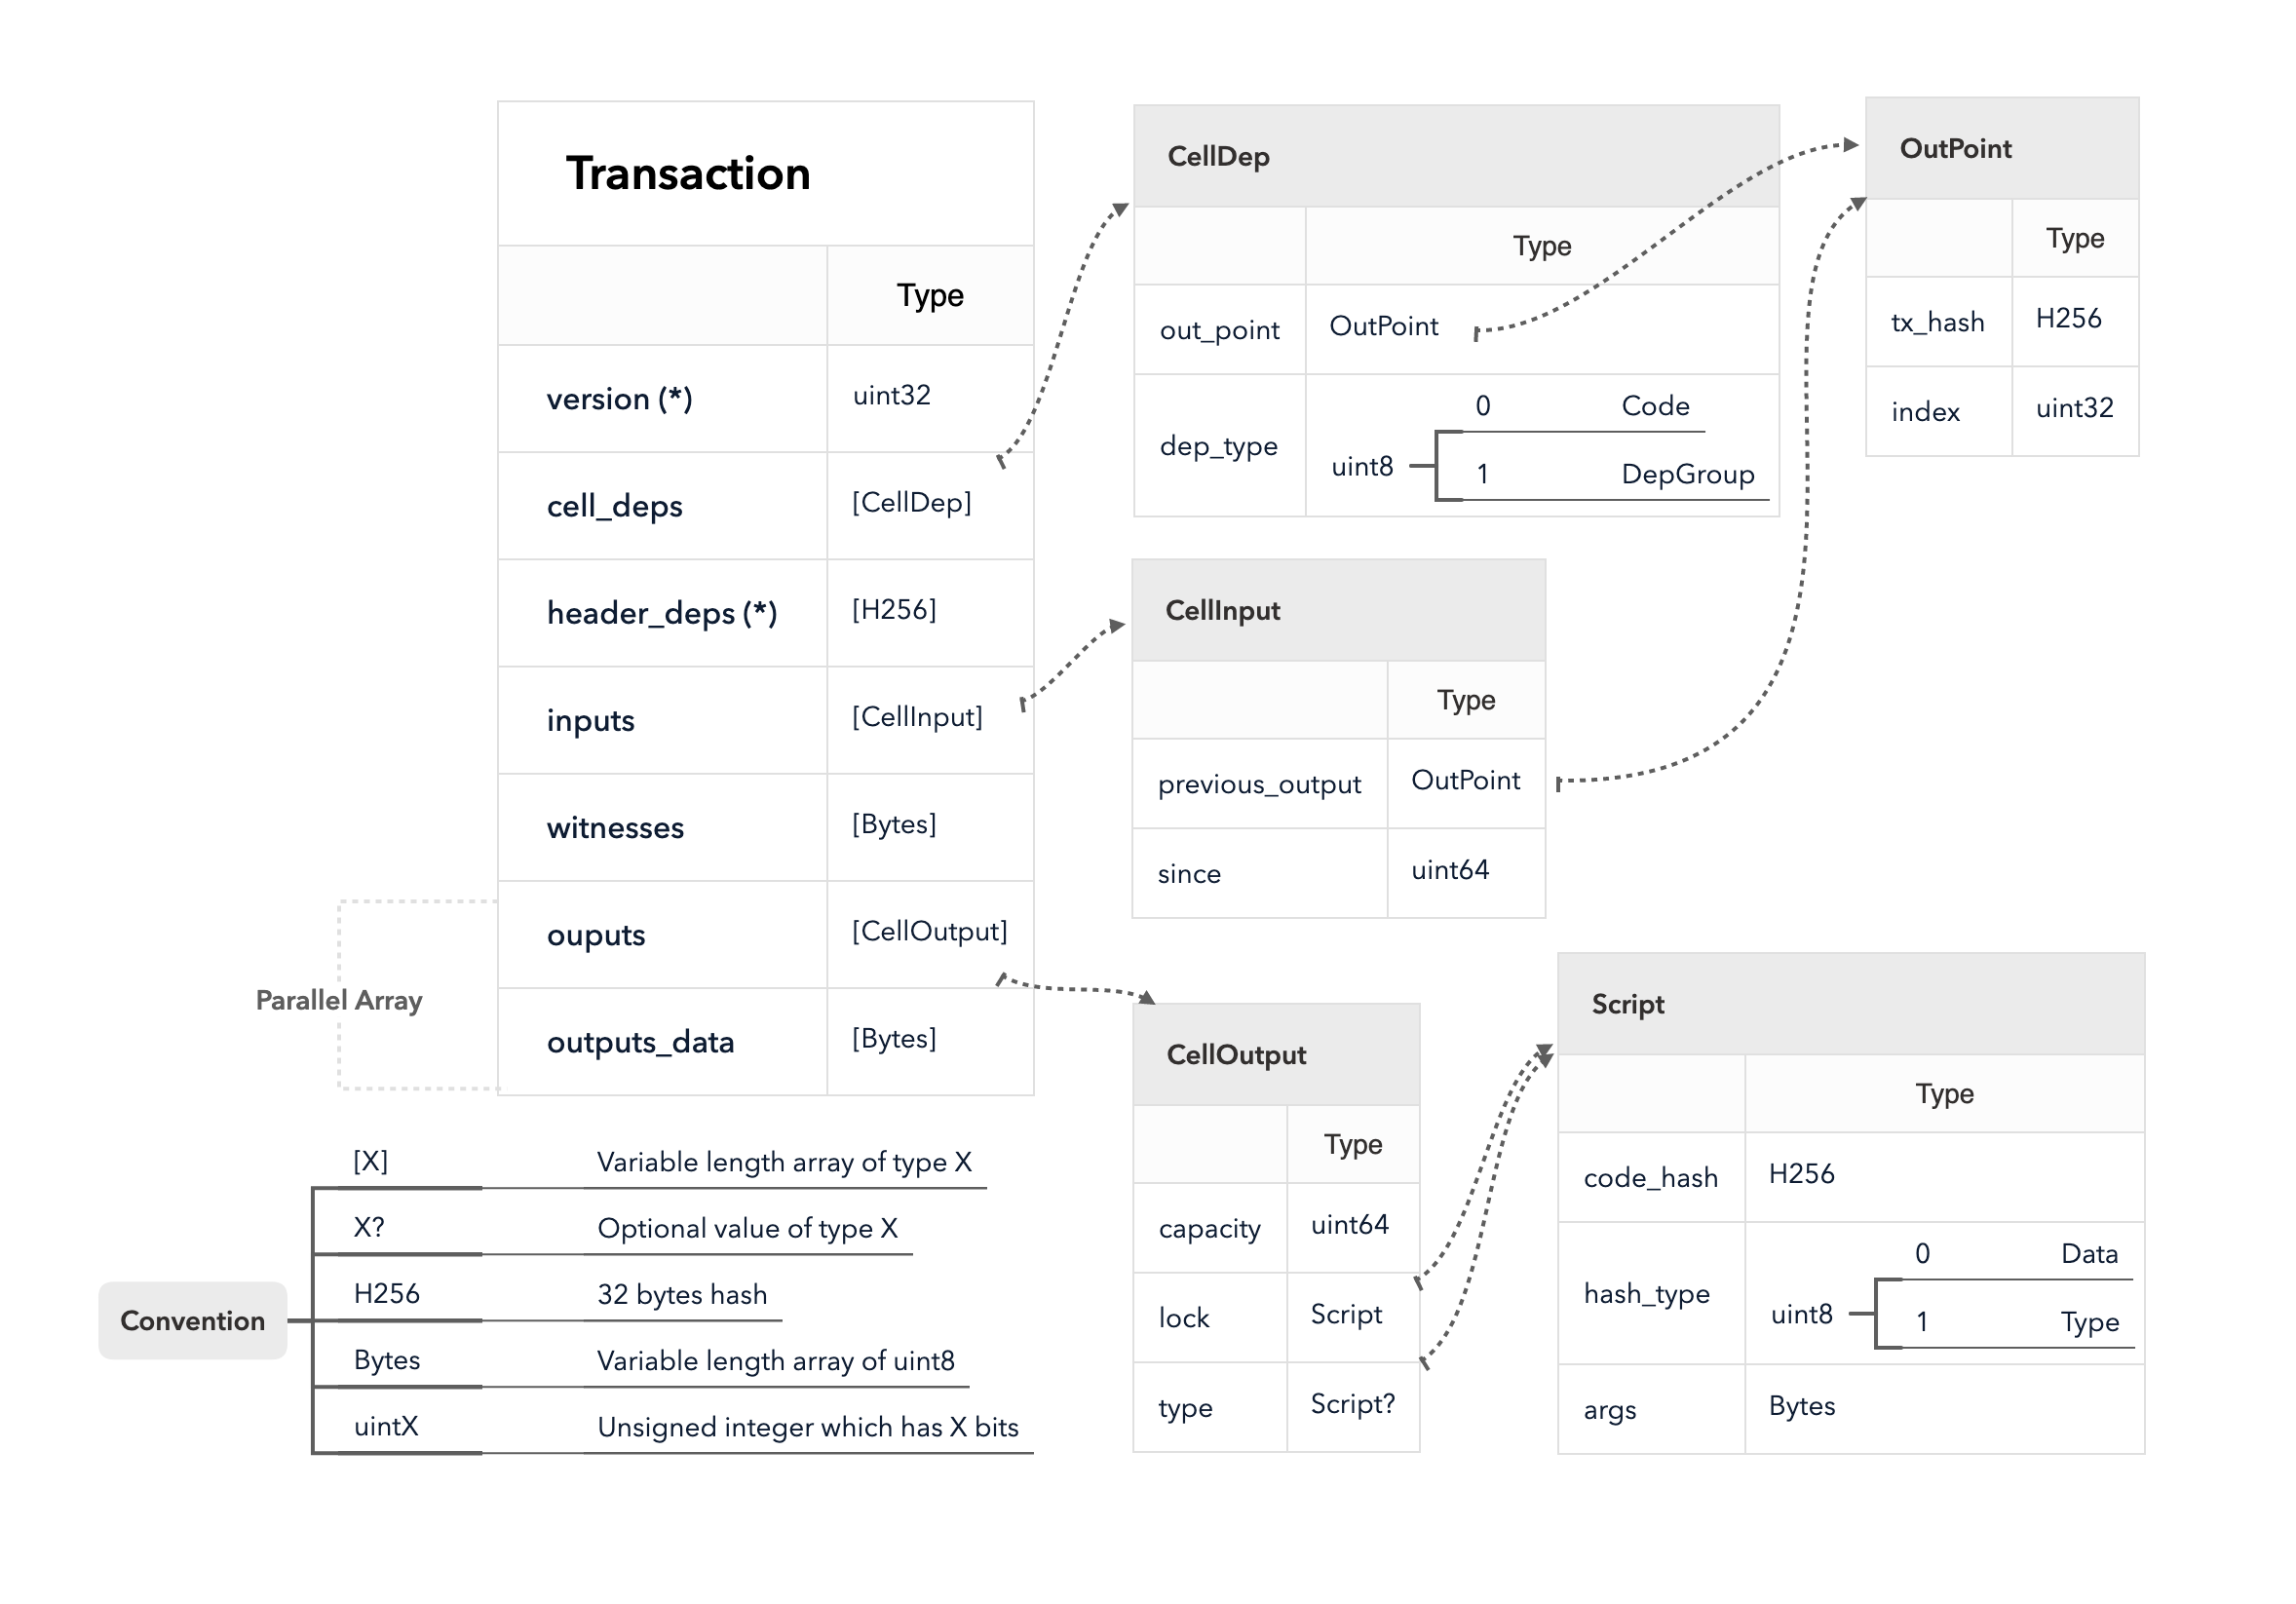
CKB Transaction Structure from RFC-0022-transaction-structure
A brief review of what each field means:
version: transaction version. The current value is 0.cell_deps: cell dependency of a smart contract, i.e. “script”, in CKB). If you want to run logic in a certain smart contract, you need to specify which cell its code is located in.header_deps: header dependency of a smart contract. Some smart contracts (like DAO) need data in certain block headers, and you have to specify those headers where they are looking for data in this case.Inputs: location of the consumed cells. They are the outputs of other earlier transactions.Witnesses: necessary information to unlock inputs, often referring to signature.Outputs: output list of a transaction. The data structure of output is calledCell, which contains the amount of CKBytes and references to the used contracts.Output_data: data attached with the output, which may be used by smart contracts.
Now we’re about to construct a transaction to send 100 CKBytes to the following address:
ckt1qzda0cr08m85hc8jlnfp3zer7xulejywt49kt2rr0vthywaa50xwsqw7lylgpn2j67xrlf4y76jwnznq0a8ufggsz6xpa
The output received earlier will be spent and two new outputs will be generated. One is the 100CKBytes to be sent; the other is the change returned. Add code as follows:
Transaction tx = Transaction.smartBuilder(network)
  .addCellDeps(Contract.Name.SECP256K1_BLAKE160_SIGHASH_ALL)
  .addInput("0x167f4f9517b7e208f4104eb7b3161c0669c97da7a13bccffe75f0c46cfb7885f", 0)
  .addOutputInBytes("ckt1qzda0cr08m85hc8jlnfp3zer7xulejywt49kt2rr0vthywaa50xwsqw7lylgpn2j67xrlf4y76jwnznq0a8ufggsz6xpa", 100)
  .addOutputInBytes(address, 9899.9)
  .build();
printJson(tx);
You may notice the number of coins in the Input (10000) doesn’t equal to that in the Output (100+9899.9). The 0.1 CKB difference accounts for the transaction fee.
In CKB, smart contracts are located in cells. When we call a smart contract, we need to attach the location of its cell, namely OutPoint, to the transaction's CellDeps. This is what addCellDeps did in the code above. The smart contract Secp256k1Blake160SighashAll used in this transaction defines the logic to unlock cells.
The printJson(tx) will print out the transaction in JSON format:
{
    "version": "0x0",
    "cell_deps": [
        {
            "dep_type": "dep_group",
            "out_point": {
                "tx_hash": "0xf8de3bb47d055cdf460d93a2a6e1b05f7432f9777c8c474abf4eec1d4aee5d37",
                "index": "0x0"
            }
        }
    ],
    "header_deps": [],
    "inputs": [
        {
            "previous_output": {
                "tx_hash": "0x167f4f9517b7e208f4104eb7b3161c0669c97da7a13bccffe75f0c46cfb7885f",
                "index": "0x0"
            },
            "since": "0x0"
        }
    ],
    "outputs": [
        {
            "capacity": "0x2540be400",
            "lock": {
                "code_hash": "0x9bd7e06f3ecf4be0f2fcd2188b23f1b9fcc88e5d4b65a8637b17723bbda3cce8",
                "args": "0xdef93e80cd52d78c3fa6a4f6a4e98a607f4fc4a1",
                "hash_type": "type"
            }
        },
        {
            "capacity": "0xe680009580",
            "lock": {
                "code_hash": "0x9bd7e06f3ecf4be0f2fcd2188b23f1b9fcc88e5d4b65a8637b17723bbda3cce8",
                "args": "0x8006353b8c0f748e78a96b9fe19d1eeb7e661dc3",
                "hash_type": "type"
            }
        }
    ],
    "outputs_data": ["0x", "0x"],
    "witnesses": ["0x"]
}
The JSON representation of the CKB transaction is easy to identify: the numbers are encoded into a hex big-endian sequence, which is the same format as the transactions directly sent to CKB.
5. Sign a Transaction
Next, we must sign the transaction to prove that we have the ownership to spend the cells. CKB uses group signatures: if multiple inputs of a transaction all belong to the same address, they are grouped and signed as one. After signing, the data will be put into the witness field.
Signing requires the key pair generated earlier. Enter the code as follows:
Secp256k1Blake160SighashAll.newFulfillment(keyPair).fulfill(tx, 0);
The fullfill(tx, 0) here suggests that the inputs with index number 0 are regarded as one group for signing. If there are more than one input owned by the same address in the transaction, change the code to fullfill(tx, 0, 1, ..., n), which means that we use group signatures with Input 0, Input 1, …, Input n as the members.
Print the transaction. You will see that the witness is filled.
printJson(tx);
The signature is in the witnesses field, as shown below:
{
  // omit other unchanged fields
  "witnesses": [
    "0x550000001000000055000000550000004100000070323275e4a0738220b5c7834baba64ecef9b75dd53d1ba68a3a8e00db13ffb237063e1e900701c94f99b131e22bac076f5583f38a993310cc3330b6662c446500"
  ]
}
6. Send a Transaction
Now that the transaction is constructed and signed properly. We can use the code below to finish our CKBytes transaction.
CkbService service = CkbService.getInstance(network);
byte[] hash = service.sendTransaction(tx);
print(hash);
Having connected to the CKB public nodes, we can send this transaction via JSON-RPC send_transaction. Once the transaction is verified, the CKB nodes will return the hash value.
Click Run and wait for the transaction to be added onto the chain. You can then check the transaction details via CKB testnet explorer.
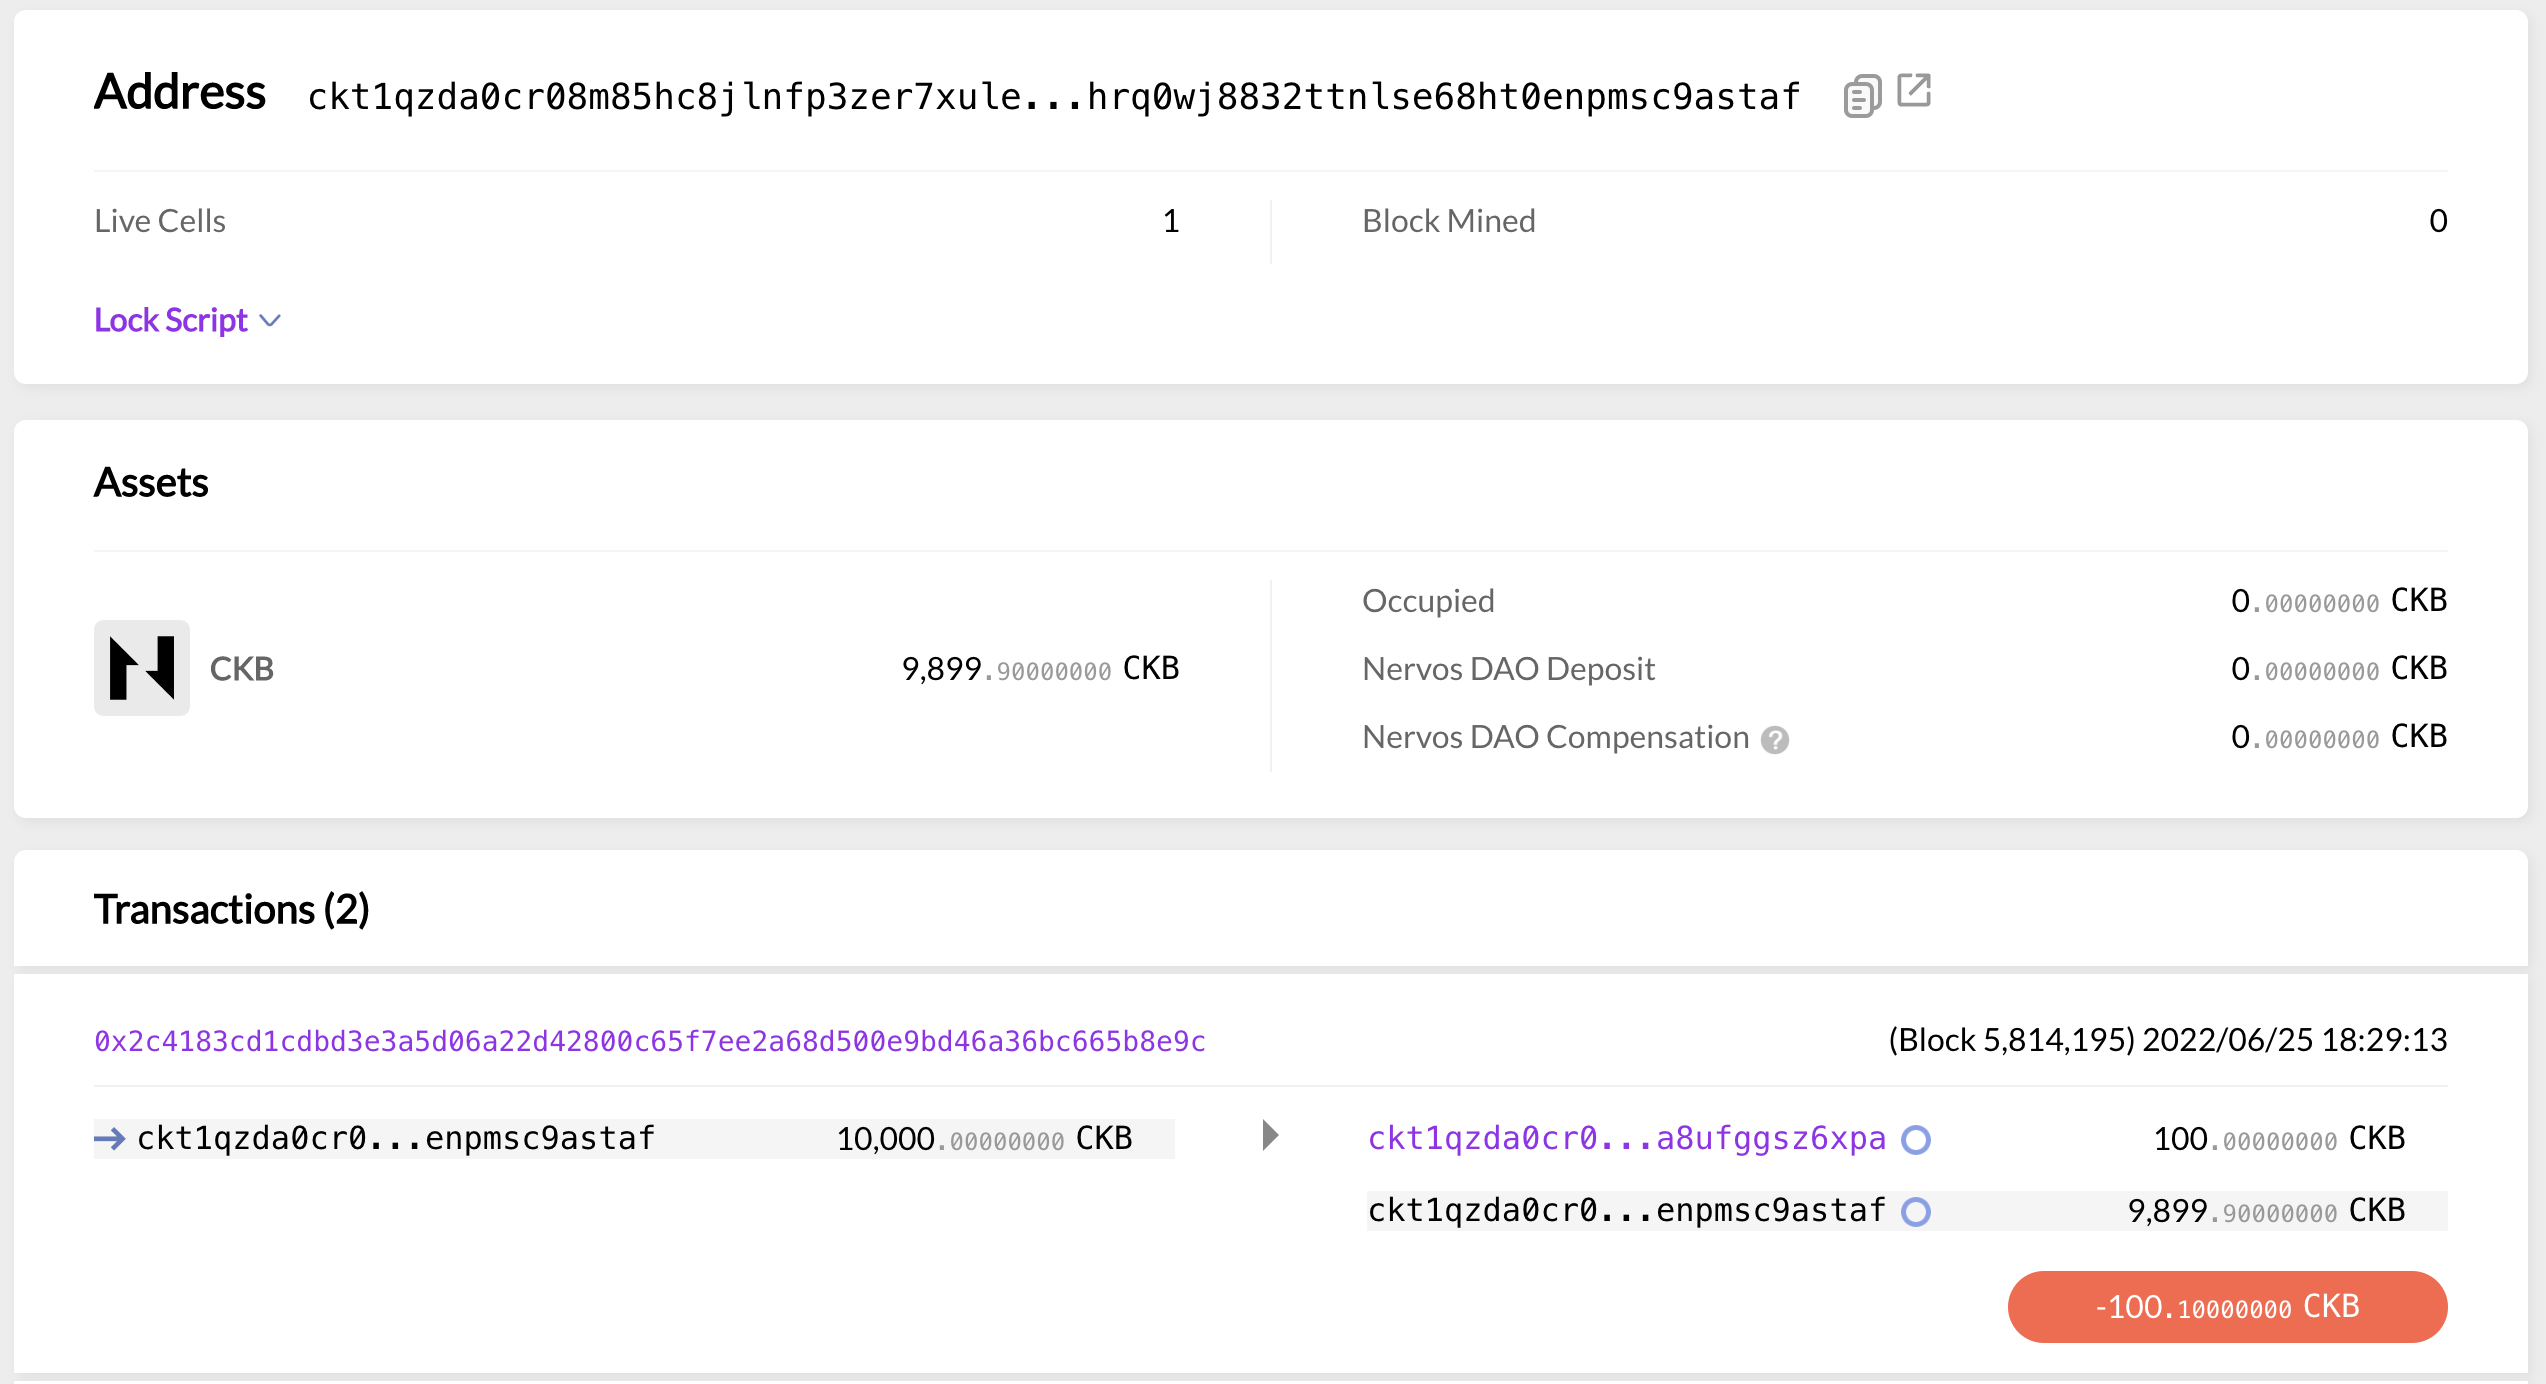
You can observe a change in your balance in the browser: 10,000 CKBytes is now 9,899.9 CKBytes, because 100 CKBytes have been spent and 0.1 CKBytes were consumed as the transaction fee.
Well done! We have successfully completed a CKB transfer from scratch and the our transaction has been stored on-chain.
What We've Learned
We have walked through the entire process of making a CKB transaction: create an address, construct and sign the transaction, and add it to the blockchain. We have modified three fields: Input, Output, and Witness. during the construction and signing stages
I‘d like to note that the type of CKB common address is Secp256k1Blake160SighashAll. The different addresses in CKB perform different unlocking logics specified in the smart contracts. These contracts are fundamentally nothing different from those which anyone can deploy. By deploying a smart contract, you can create a new type of address with your custom logic to unlock cells.
This is a CKB transaction in its simplest form. Interested to find out more? Change a few more things and see what happens, such as:
- Use the output that has already been spent in Input
- Spend multiple outputs in Input
- Make the number of CKBytes in the output greater than that in the Input.
If you want to learn more about constructing transactions in CKB, we recommend reading the following:
- The transaction structure: RFC-0022-transaction-structure
- CKB basic data structures: RFC-0019-data-structure
- Signature process of
[Secp256k1Blake160]addresses and its Java implementation.
✍🏻 Written by Fengjun Chen
Want to learn more about CKB? 👇🏻